Mastering Domain Setup in cPanel: Quick and Easy Steps
Publish By:- CodeInputs
In this blog, we provide a comprehensive guide to setting up domains on your cPanel server with ease. Whether you're adding a new domain, configuring DNS settings, or managing multiple domains, this tutorial walks you through every step. You'll learn how to efficiently add and organize domains, customize settings, and troubleshoot common issues, making it simple to streamline your domain management in cPanel. Perfect for beginners and seasoned users alike, this guide will help you confidently handle domain setup on your cPanel server.
What is Domain?
A domain is essentially the address of a website on the internet, allowing people to find and access it easily. It’s the part of a URL (web address) that comes after "www." or "http://" – like example.com in the URL https://www.example.com.
Domains are divided into two main parts:
- Top-Level Domain (TLD): This is the ending of the domain, such as .com, .org, .net, .edu, etc.
- Second-Level Domain: This is the unique part chosen by the website owner, like example in example.com.
In short, a domain is the easy-to-remember name used to locate and access websites, helping connect users with information online.

Here’s a step-by-step guide:
Step 1: Log into cPanel
- Access your cPanel account by entering your domain followed by “/cpanel” (e.g., yourdomain.com/cpanel) in the browser.
- Enter your username and password to log in.
Step-2 Add the Domain
- In the Domains section, click on Domains or Addon Domains depending on your cPanel version.
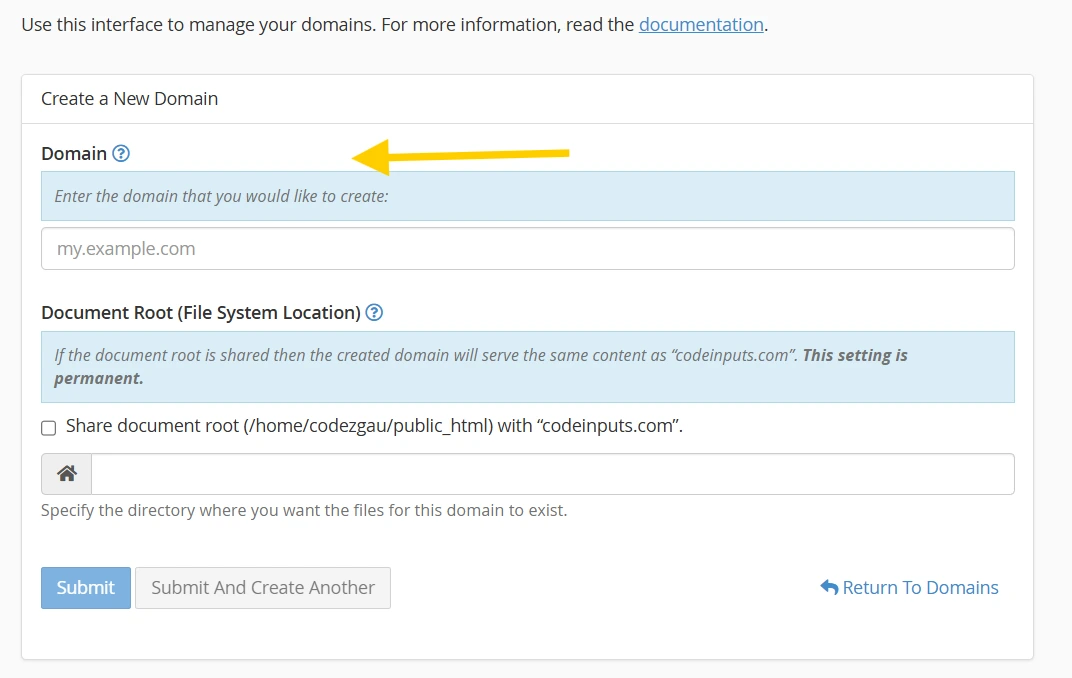
- If you’re adding a new domain click Create a New Domain button.
- Fill in the New Domain Name field with the domain you want to add.
- After entering the domain name, the Subdomain and Document Root fields will populate automatically. Adjust these if needed.
- Click Add Domain to save the domain.


Step 3: Configure Domain Settings
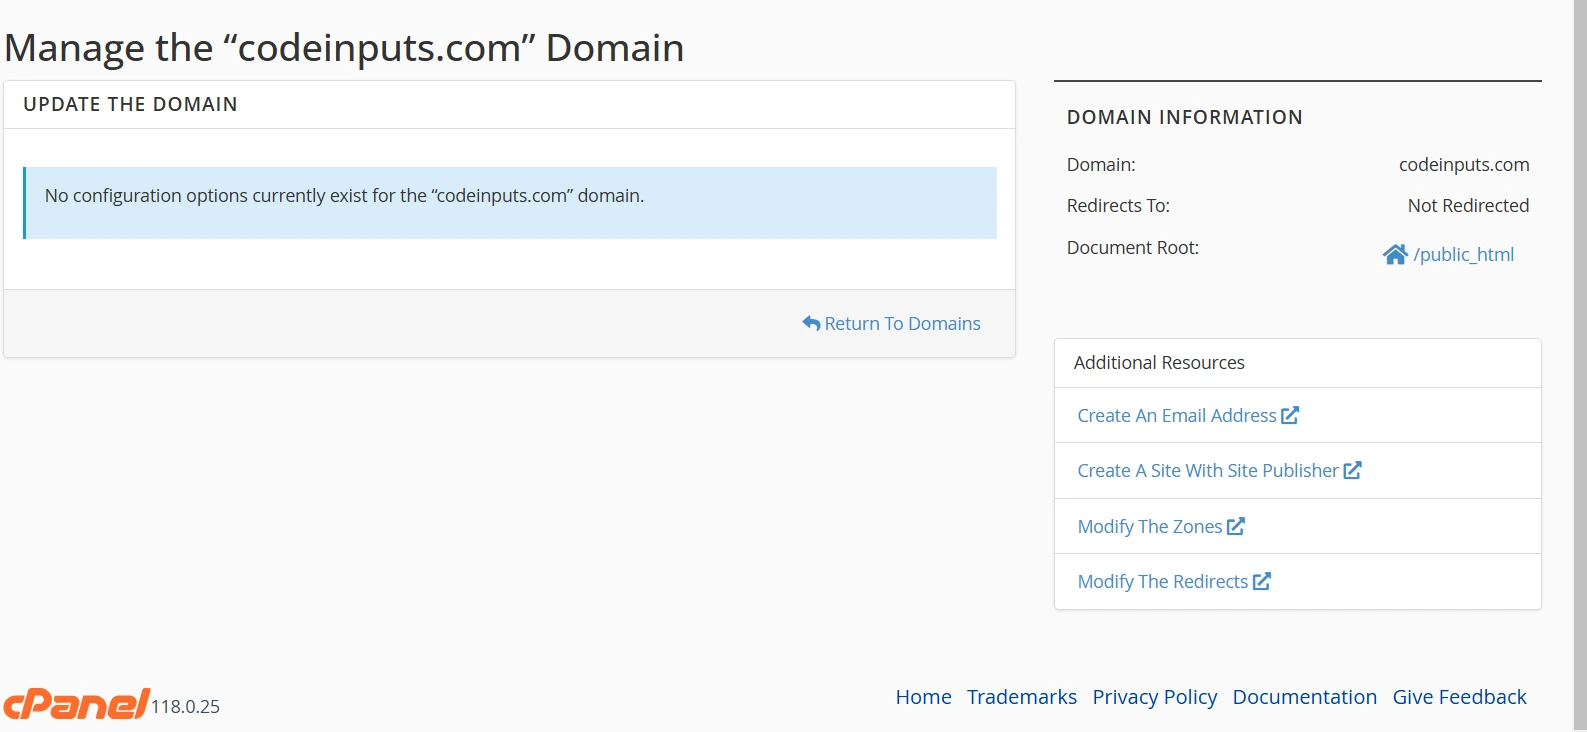
- Once the domain is added, configure any settings specific to this domain, such as email accounts, SSL certificates, or redirects.
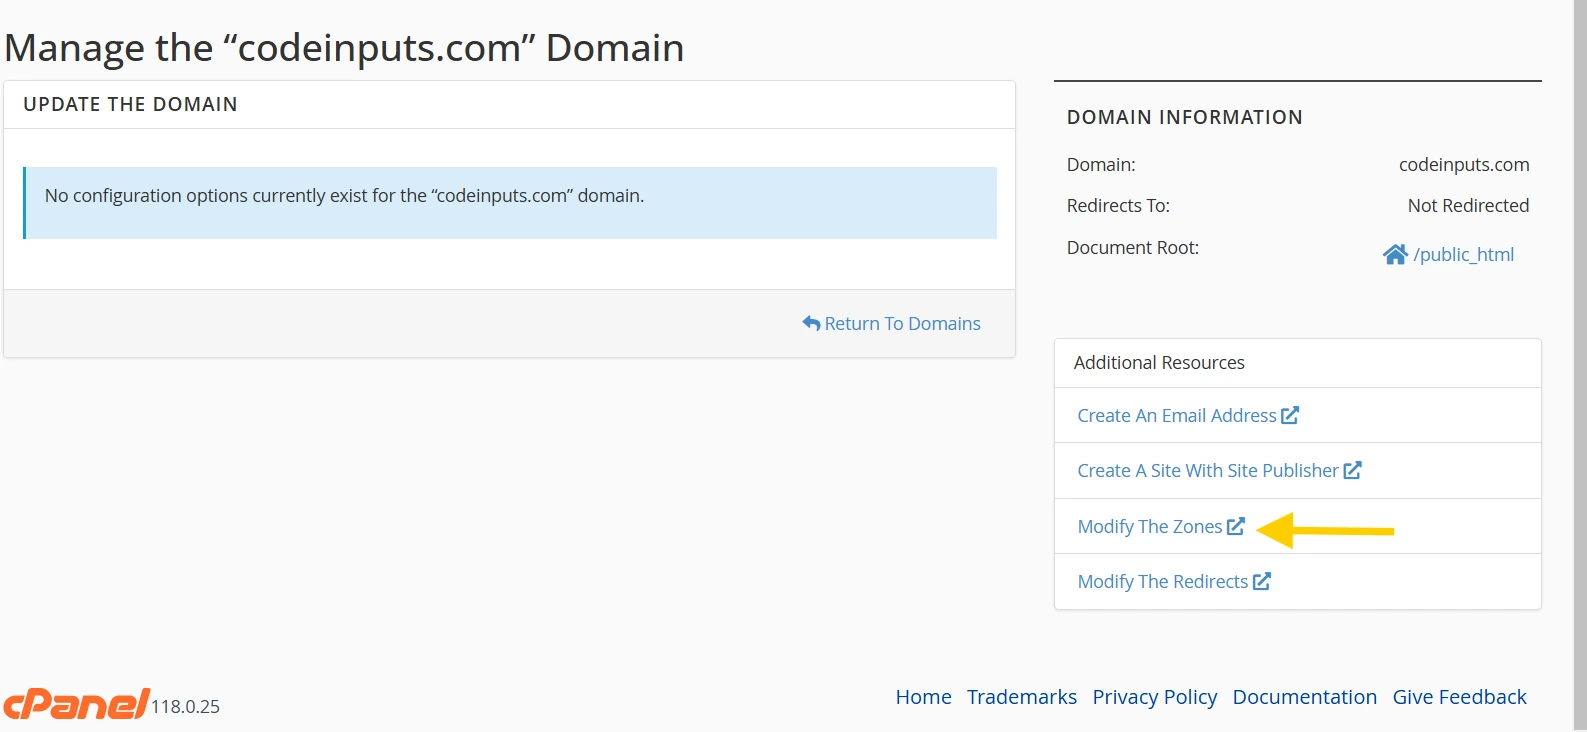
- Go to Zone Editor if you need to manage DNS records.


Step 4: Link to Hosting (if needed)
- Point your domain’s DNS to the hosting provider’s nameservers where cPanel is hosted.
- After updating DNS, it may take some time (up to 48 hours) for changes to propagate.
Additional Notes
- Addon Domains allow you to host multiple sites on the same hosting account.
- You can manage all domains in the Domains section.
Now your new domain should be added and ready for use within cPanel!

Recent Post
Recent Comment
No Comments to Show